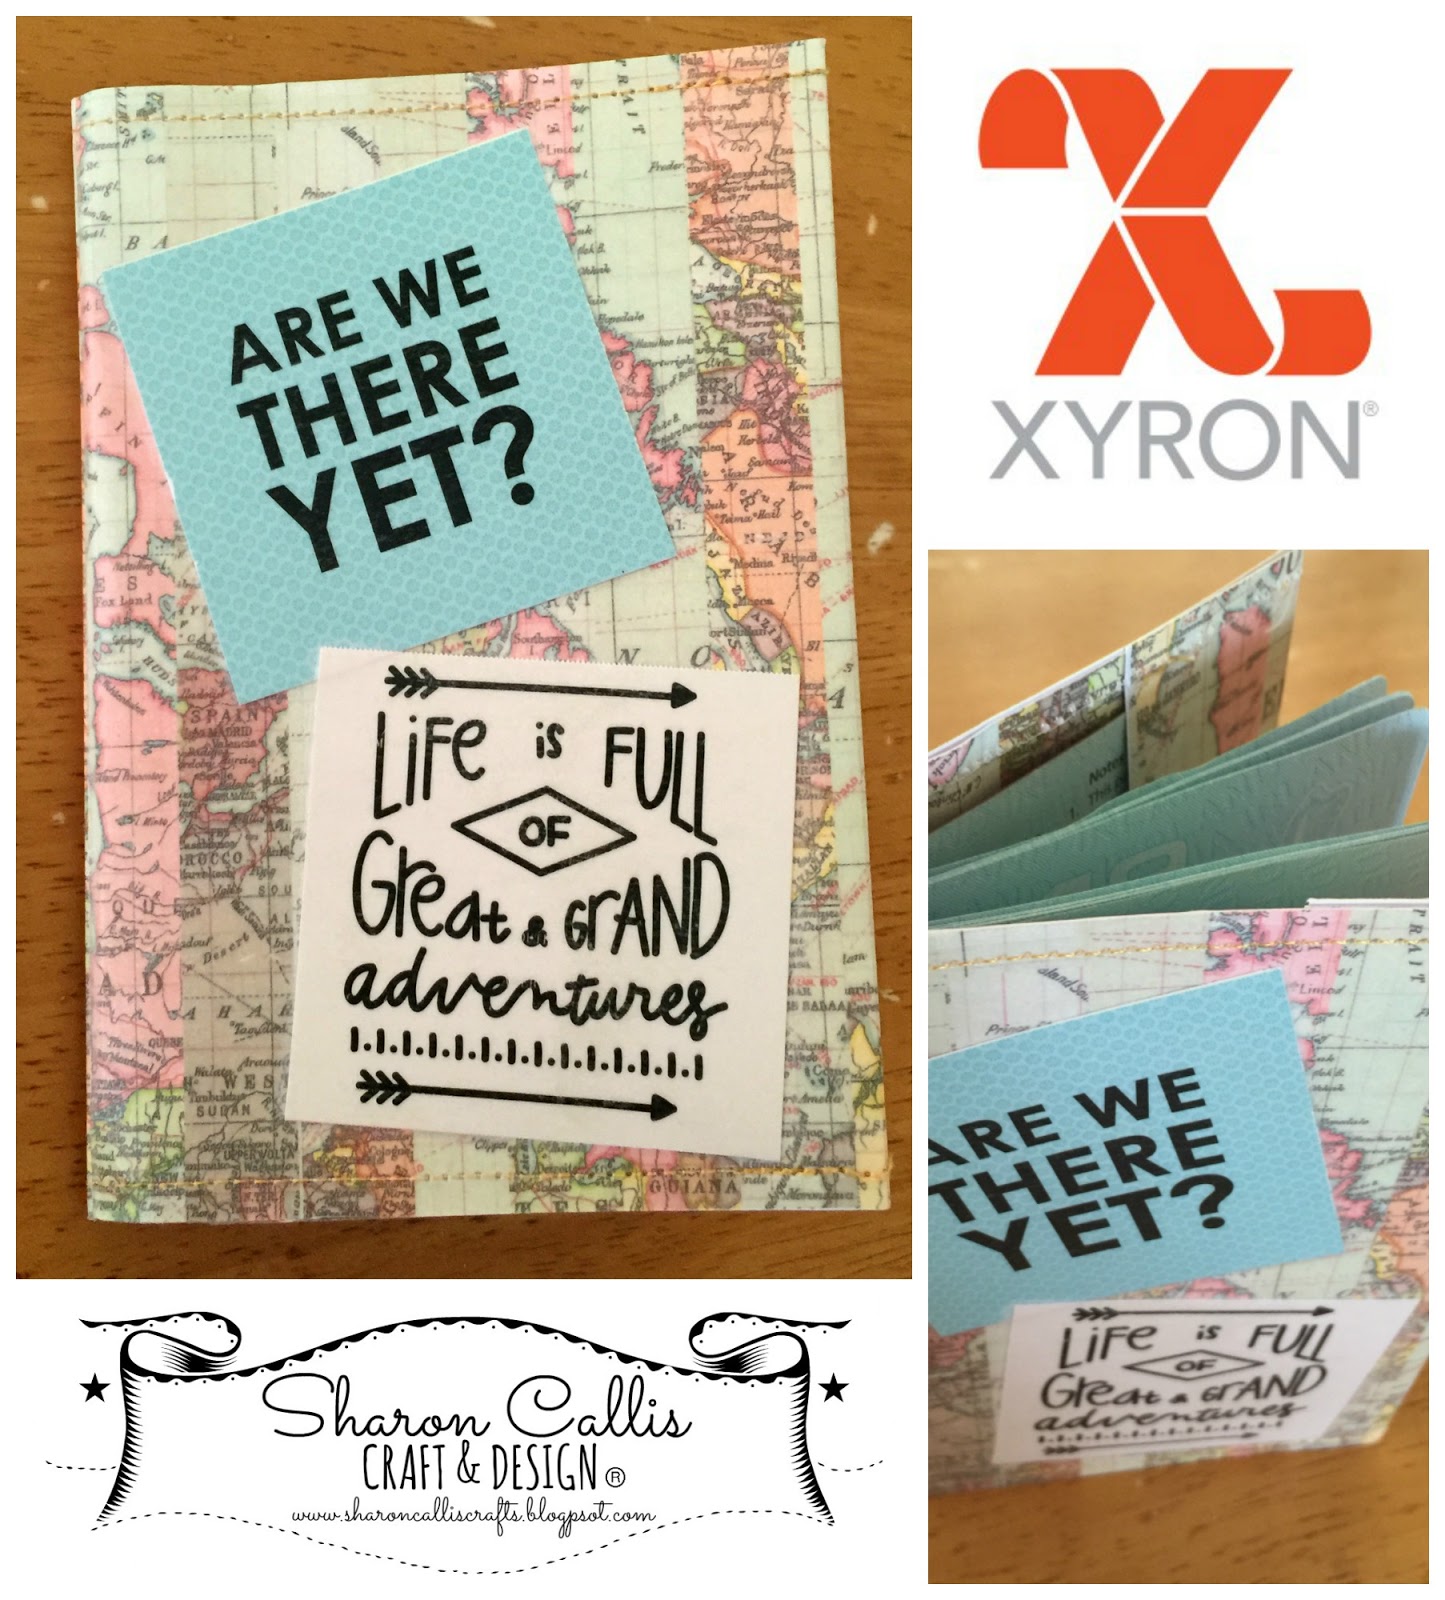
Passport Holder made using Xyron Laminate
Hey everyone, I hope that you are getting a little sun this summer!. Here in Ireland as usual it has been raining a lot and I really wish that I was heading away on a vacation to a hotter climate. For now I'll settle for my travels between here and the UK for work, which is the inspiration behind today's Project. My passport cover was a little tattered from use so i have made a new one using the Creative Station Lite and the 5" Laminate/Permanent Adhesive Cartridge. The papers are from the awesome DCWV 12 x 12 'Treasures' and the mini Stateside sentiments stack
Supplies
A few steps to help you make your own cover....
- Open out your passport onto the cover paper, mark a boarder leaving approximately a half inch around the edge.
- Keep the left over paper, this will be used on the inside of the cover.
- Fold the paper in half, place the passport into the fold and mark the edges for the fold overs.
- Using a creasing tool mark all the folds and using the Xyron 3" sticker maker add the cut out sentiments to the front of the cover.
- Run the cover through the laminate cartridge of the Creative Station Lite.
- When you peel away the wax paper packing the reverse of the cover will have adhesive applied, place the cover adhesive side down on the reverse of the left over paper and trim around the cover to remove the excess laminate and paper.
- Re-crease the folds and using a sewing machine stitch along the top and bottom borders to hold the folds in place, these folds will keep your passport inside the cover.

Thanks
for stopping by my blog today, you can also follow my official Facebook page. Check out Xyron on Facebook too for amazing craft inspirations every day.
Xyron Products supplied as part of the Xyron Design Team


Comments
Post a Comment
All comments subject to moderation.